As an Amazon Associate DcSoundOp earns from qualifying purchases.
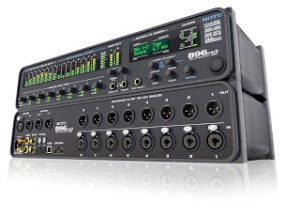
Every so often in this line of work, you may come across a piece of gear that you just get along with well. A piece of gear that you may have originally purchased for a simple task, but over the years, you continue to find new ways to utilize in solving everyday problems. For many folks over the past 20 years, the Mackie 1202 has served in this role willingly. Blurring the line between small mixer and A/V direct box, the 1202 is known as one of the “swiss army knife” type of products in the pro-audio world, capable of handling a wide range of different jobs while perhaps not being the best possible option for any individual task. It’s the reliability, predictability and easy of use that made the 1202 so popular for so many years… So, can this same feeling for a product be captured by a digital audio interface? Can it offer the same reliability, predictability and ease of use as it’s analog predecessor? More importantly, can it take what the 1202 does for us and provide similar functionality for the digital domain? I think the MOTU 896 carries the torch forward very elegantly, solving many of the problems faced working in modern audio and video environments.
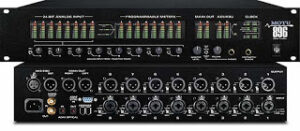
Offered in a few different flavors (896/896HD/896Mk3) over the years, these units have all included the same basic features. The key features offered in all three models include eight microphone preamps with both XLR and 1/4″ inputs on combo jacks, eight assignable balanced XLR outputs, two balanced XLR Main Bus Outputs, AES In/Out, WordClock In/Out, ADAT Sync i/O along with assignable ADAT Optical i/O. All three generations of the units have offered similar 24Bit A/D / D/A converters which can be operated from 44.1 up to 96kHz, giving you a simple high-quality path for getting audio in and out of your computers. The original 896 was especially unique at the time of it’s release as it was one of the first available units capable of offering all of these feature with a simple firewire cable teathering you to your workstation. This seems trivial now, but at the time, the other pieces of equipment on the market capable of offering similar features all operated utilizing PCI cards that had to be fitted into a tower or desktop PC.
PCI card slot interface devices do have advantages, I have utilized the MOTU 2408Mk3 for my home studio previously as I was running a stand-alone digital mixer and just needed digital inputs,without the need for any mic preamps or xlr outputs. For non-mobile use, PCI based solutions can be very powerful interfaces.
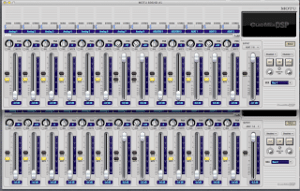
The big disadvantage to PCI interfaces is that they preclude laptop users from ever being able to join the party. If you’re hoping to be mobile with your recording or mixing setup, carrying a laptop or similar (Mac Mini) is the only way to travel. Being able to bring the kind of firepower offered in the MOTU 896, in a simple, lightweight and rugged firewire interface is something that really keeps me using it almost every single day. The big secret however to getting the most out of this unit does not lie in the hardware, although it is well built and very much functional on it’s own. The place where you really unlock the power under the hood of this humble box is in it’s control software. The MOTU CueMix software is where you get to manage all of the routing, create different mixes, assign those mixes to outputs and generally shape and route your sounds as needed.
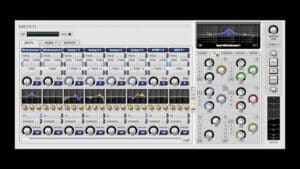
My personal setup that I have come to rely on includes a single 896Mk3 (which offers 16 channels of ADAT i/O and an effects engine for use with the CueMix mix buses) along with two of the 896HD units that I use to further expand the capabilities for larger multi-track recording sessions. With even the most basic configuration of these three units, I can reliably track 24 channels of 24bit 96kHz audio to my MacBook Pro running Logic Pro. So what makes this so special, it’s a eight input firewire interface, how is this relevant in a discussion including the success of the Mackie 1202, and why should we care? With the 896 doing all of it’s audio processing onboard and tasking your computer only with control data, along with its ability to operate without a computer connected at all, what you end up with is actually a incredibly powerful digital audio mixer, contained in a simple two rack space box, with all the necessary connectivity to play with the big boys in both the pro-audio and video industries. Four Stereo mix buses are at your disposal and can be created and routed to any of the available outputs for use as program feeds or monitor mixes etc. By choosing the correct routing and panning the inputs correctly to the associated bus out, you can create a pass-through for the onboard microphone preamps, sending them to the analog or digital outputs as needed. This type of flexibility has made the 896 a perfect high-quality stand alone mixer or an easy to configure companion to other digital audio systems. Pairing an 896 with a small mixer such as the Yamaha 01v96 allows you to add eight channels of i/O to your mixer, along with adding AES i/O capability all connected with a couple of simple optical cables. For me this makes an easy to carry, easy to scale, portable control system that I can rely on for both live and recording gigs.
 When using an audio interface with your computer for recording, you may run into some common obstacles that can frustrate and confuse a first time user. The vast majority of problems I’ve heard people having with these units all has to do with improper setup and assignment within the computer OS itself. For example, using Apple’s Core Audio, you can only address a single interface at any given time from your DAW, unless you dig a little bit deeper. This frustrates many people and even deters some from trying products such as the 896 altogether. When you open your DAW to select your interface of choice, provided you have your pair (or more) of interfaces connected together with the appropriate firewire cables, you will see them both listed in the software as available i/O devices, but no matter how hard you try, it simply will not allow you to select them both at the same time. So how do we get more then 8 channels into the computer all at once?
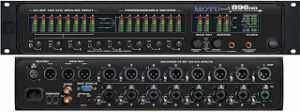
The inputs for the 896 and 896HD are laid out as follows.The first answer is simple, yet uses up some of your otherwise available inputs. In this method, you simple connect your first 896 to the computer with the firewire cable, set this as the master unit and then connect your second unit to the first using the ADAT light-pipe connections. This works just fine and gets all 16 of your microphone preamps into the computer while allowing the secondary unit to slave to the master unit, deriving it’s word-clock sync from the ADAT light-pipe signal (for this to work, you must connect both the light-pipe input and outputs of each unit together, as the word-clock signal is coming out of the master unit and into the secondary – – Alternatively you can simple run a word-clock BNC cable from the master unit WC out to the Slave unit WC in, and select the corresponding clock source setting on the slave unit). The channel (input) numbering convention within the 896 is setup in a somewhat counter-intuitive manner; this too can cause confusion, as no matter how you connect the two 896 interfaces, you will never get the analog (microphone) inputs to line up in a 1:1 relationship with your channel numbers. For example, using the ADAT connections, your second unit’s first mic input would actually show up on input channel 13, not on channel 9 where you might expect it to be.
Channels 1-8 (Analog Inputs) [Configured as above, these are your microphone inputs]
Channels 9-12 (AES Inputs)
Channels 13-20 (ADAT Inputs) [Configured as above, these are your second set of 8 inputs)
The 896Mk3 adds a second bank of ADAT inputs which show up on channels (21-28).
Now, this works fine for simple projects, but what if you need to use those ADAT inputs to gather signals from other devices, such as the aforementioned 01v96 digital mixer? How do we get both of the 896 interfaces to work in tandem without eating up all of the extra digital i/O. The answer here is to create an aggregate device, which is accomplished in the Audio/MIDI Utility located within Apple OSX.
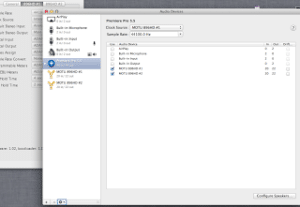
To accomplish this, you simply open the Audio MIDI setup utility, find your device(s) which are listed in the left column. You then simply click the + in the lower left corner, select Add Aggregate Device and then select the devices you wish to bundle together. Once you accomplish this, your devices will show up in your DAW audio preferences as a single device (you have the opportunity to name your aggregate device as you create it) which you can select and then use as a single interface.
Using this method of connecting multiple units you are again faced with an unusual numbering convention, your second unit’s first mic pre will now show up on channel 21, which is even further from channel 9 where you may want to find it in a hurry. This is the case, as the second interface input channels appear on the computer after all of the inputs on the first unit, giving you access to both the analog and digital inputs of each unit. This seems to be the way with every interface I have used in the past, not just a MOTU issue. It’s something that you learn to deal with, much in the way that you learn to think through multiple patching layers and cross-patches in a live stage environment. Once you get your mind working in the bigger picture of what’s going on, you’ll hopefully stop thinking to look for your ninth microphone input on channel nine… or maybe you’ll just have to take a few more detailed notes during your setup then you’d like to.
 Without getting further into every routing possibility offered in a setup such as this, I hope this has served as a jumping off point to get you thinking about alternative ways to utilize the gear you may already own in new ways. I have often heard people refer to different pieces of pro-audio gear as either live gear or recording specific gear, while this may be true in certain cases, it is often just a case of how the product was originally marketed for sale that determines who feels more comfortable buying it. If you take the time to understand what a piece of gear offers, how it operates and what it’s abilities and limitations are, you can utilize it for many more purposes then you will ever read about in a marketing brochure which is typically directed at the largest possible target audience. The key to being effective in audio is to understand the bigger picture of what you are trying to accomplish and to find a way to produce those results in a reliable and flexible way. Understanding how to harness readily available technology in new ways can save you both time, money and a whole lot of trouble carting around heavy gear that you may not really need.
Amazon and the Amazon logo are trademarks of Amazon.com, Inc, or its affiliates.
