As an Amazon Associate DcSoundOp earns from qualifying purchases.
It seems like this past month has gone by incredibly quickly. Back on May 9th we loaded in and started what would be a three week run of back to back College commencement and High School graduation ceremonies in a university basketball arena. I have been involved with commencements at this venue now for a number of years, and just this past winter commencement season, I did a somewhat comprehensive walk-through video of the setup we used. That video has been very popular, and since the system we used this time was very similar, I didn’t see much point in making another identical video. I’ve linked the previous video below so you can check it all out!
 Catching up with other news, the Q-box project is moving forward and I’m hoping that anyone interested in building one of their own will join the discussion here in the new FORUM section I have setup. So far there has been a lot of great e-mails and messages from folks who are interested or planning on building one too and it would be great to get everyone working together in one place, as keeping up with the different conversations that are taking place over e-mail, reddit and the comments section on YouTube is proving to be less than efficient.
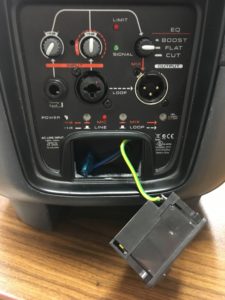
In unusual failures this month, a few weeks ago I came across an unusual failure on an older JBL EON 500 Series cabinet. Apparently the whole power input connector came undone from the rest of the backplate while someone attempted to unplug it. Annoyingly, the leads on inside of the speaker were too short to reattach without opening the box further, and as you can see in this photo, the live terminals were exposed somewhat after the failure occurred. This is less than ideal for a product that is intended for a consumer or non-professional user, but this model has been discontinued and replaced by the 600 series for some time now, so hopefully this is no longer a potential issue.
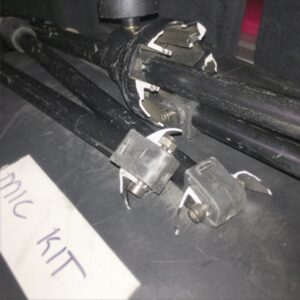
We also had a overly eager pallet jack operator drive over the legs of one of our microphone stands a few weeks ago, leaving in its wake a trail of destruction and metal scraps unlike anything I’ve seen in the past. Bonus points to Whirlwind on this one though, as these stands are so modular the actual destruction was limited to only the bottom center portion of the stand where the legs attach, and may still be salvageable if parts can be obtained. Either way, it was interesting to see!
In a

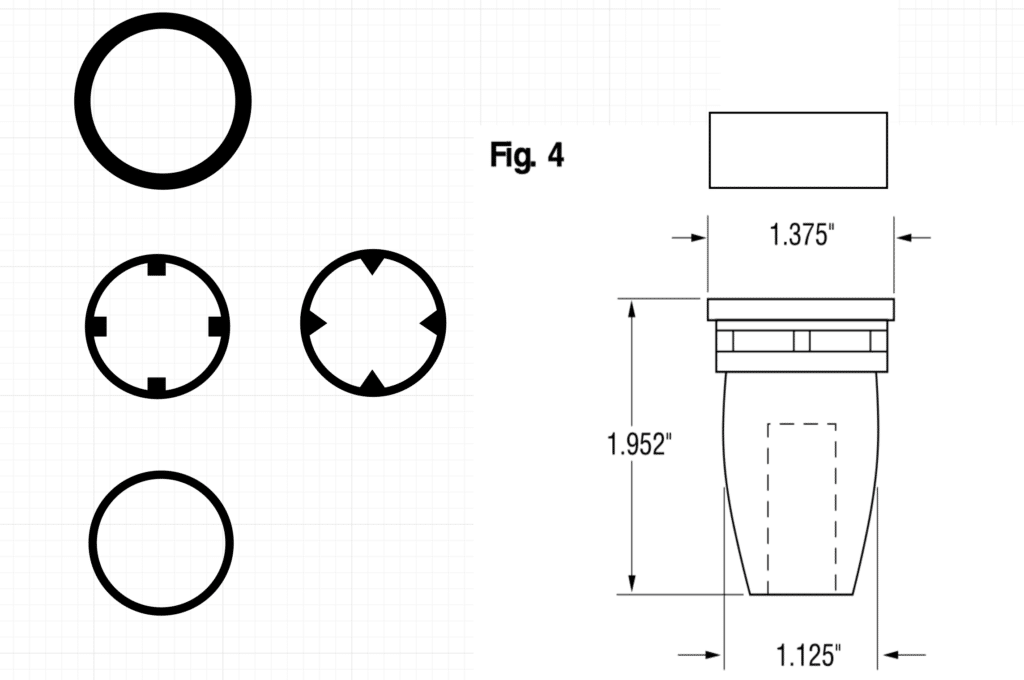
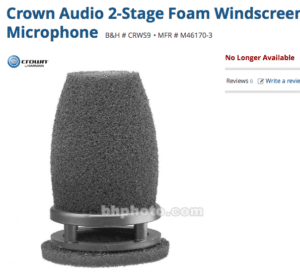 The original Pop-filter can be seen here and features a really simple yet effective air-gap between the top filter and the actual windscreen. This design is one of the only pop-filters I have ever used on a lectern that truly stops the most aggressive plosives. I was able to dig around online and find the original dimensions for the windscreen which I’ve attached below. I was also able to score an ENTIRE LM301-a kit on eBay for only $10, which is insane, and it also came with the plastic ring part of the filter. Unfortunately, as with most of these I’ve used, the foam has all spoiled over the years, but at least I have an original in hand to work from.
The dimensions of the original piece are:
30mm outer diameter
25mm inner diameter
~10mm overall height
Top ring height: 4mm
Spacer height: 4mm
Bottom ring height: 3mm
Not knowing anything about 3D printing, it strikes me that it would be easier to print this as two pieces, one ring with the stand-offs and another ring without that can then be glued together to form what you see in the original photo. Notice the slight radius to the ring where the main body of the windscreen portion is glued on in the photo above, I’m not sure how critical that part is, but it seems it would help to center the foam when being glued in place.
Here are the original dimensions I found online, which I’ve brought into Illustrator and begun playing around with various layouts for potential prints. I’d love to hear from anyone who has 3D printer experience as to how they would approach this.

Amazon and the Amazon logo are trademarks of Amazon.com, Inc, or its affiliates.
